Rotor and Brake Pad Install
Tools
you will need:
Expect approximately 1 hour – 4 hour change time. Caliper frame bolts are P/N 18023646
|
Date:
June 17, 2000 Car: 1998 LS1 T/A Installers: Mitch Warren (mitchntx) Email: mitchntx@yahoo.com People who helped us from major tech talk to general advice:
|
When purchasing, viewing, using, and/or any
other method applied to this publication you agree to the following statements.
You, your next of kin, heirs or assigns release www.installuniversity.com,
all other persons associated in the making, production, participation, and sale
of this publication. Rephrased in plain English: When you purchase
this CD, book, or view this web page you, your next of kin, heirs or assigns
agree not to sue any associated persons with the publication for any accident or
damage in ANY form (mental or physical to your car and/or yourself) because of
this publication or your failure to heed proper safety, maintenance and/or
modification procedures. You also agree that your next of kin, heirs
or assigns cannot sue all persons associated in the making, production,
participation, and sale of this publication.
Purpose: Changing the brake rotors and pads is just a matter of time before it has to happen. So it's worth the minimal effort it takes to perform this task.
Preface: Before you start into this install be sure you know how to use all of your shop equipment. Take your time and be careful.
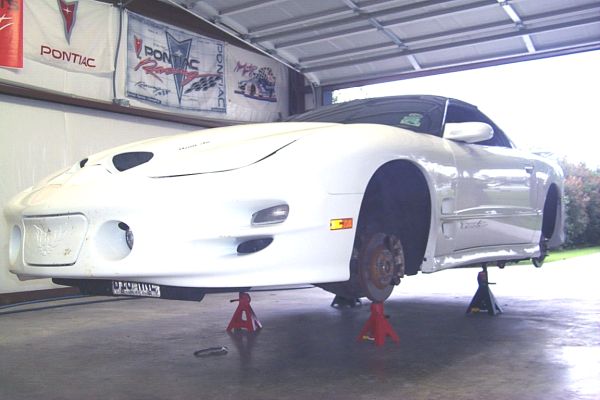
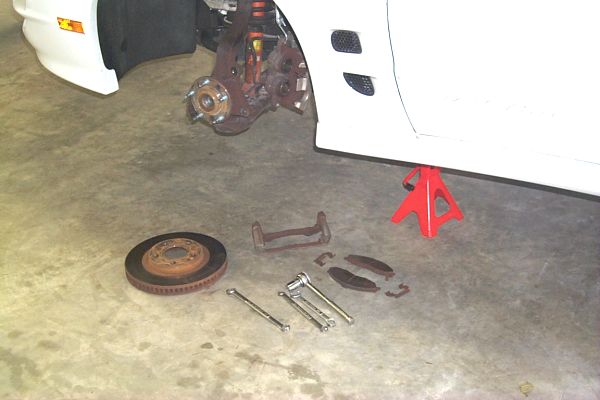
1. Support the car on jack stands rated to withstand the weight of you car. Place the stands on the appropriate lift points and remove all 4 tires (see Figure 1).
Figure 1
2. The driver's side front brake set-up is a mirror image of the passenger side. The rear systems are mirror images as well. The illustrations are taken on the driver's front system. The other 3 corners have similar mounting setups and should be worked similarly.
3. First things first. This is a dirty job. Road grime and brake dust, even brake fluid may make this job a filthy one. I cannot stress enough how important it is to keep the rotors, calipers and new pads absolutely clean. Use brake cleaner spray liberally.
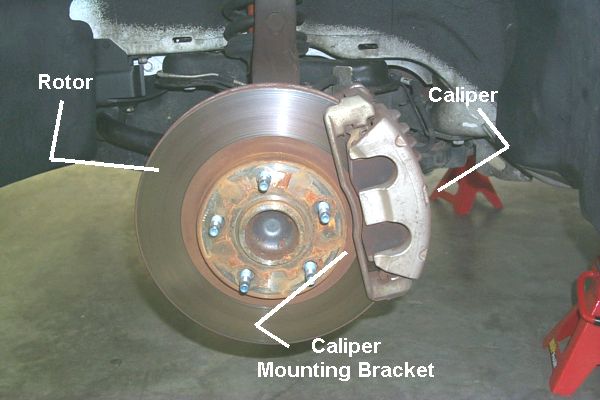
4. After the wheels are removed, here is what you'll see: the caliper, caliper mounting bracket and rotor (see Figure 2). On the backside, you'll see a couple of wires running along the spindle. This is your ABS sensor wiring. Be very careful when wrenching around these wires and sensors.
Figure 2
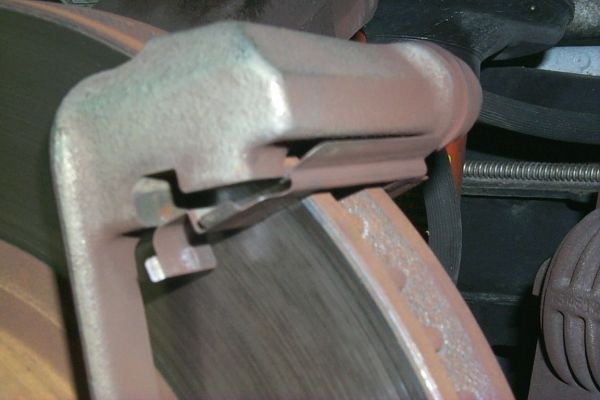
5. To remove the caliper: locate the two 12mm caliper-mounting bolts on the rear of the caliper (see Figure 3). In the figure, the upper bolt is in the shadow. But it's there. There is a threaded sleeve the caliper bolt attaches to and has flattened sides that a 16mm wrench will fit on (see Figure 4). Remove the bolts and the threaded sleeves remain with the caliper. As soon as the bolts are out, pivot the caliper back and out of the mounting bracket (see Figure 5).
Figure 3
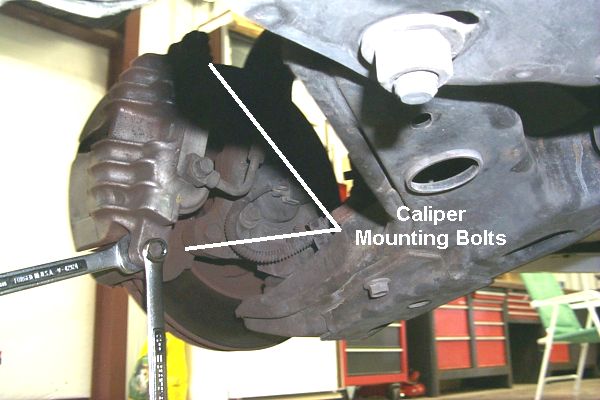
Figure 4

Figure 5
6. Warning! Do not let the caliper hang by the brake line. Support the caliper in some way. I use a 12" rubber tie down strap looped through the spring. Letting the caliper dangle from the brake line risks damaging the brake line.
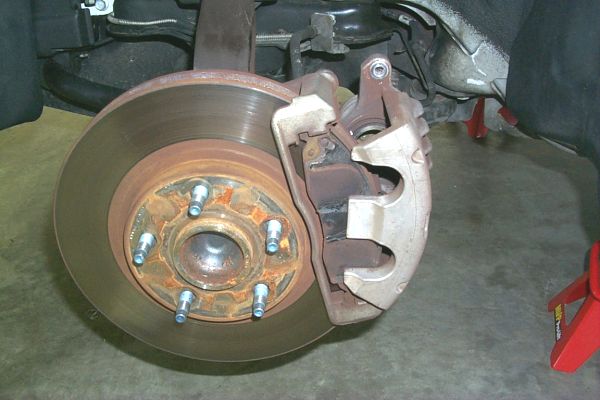
7. Once the Caliper is removed, the brake pads come out on either side of the rotor (see Figure 6). Notice an upper and lower brake chatter plate (see Figure 7). These thin metal plates are what the brake pads rest in. They snap out from the left side. Don't forget to replace or re-use these.
Figure 6

Figure 7
8. If you are replacing pads only, go to Step 14 as this is as far as you need to go.
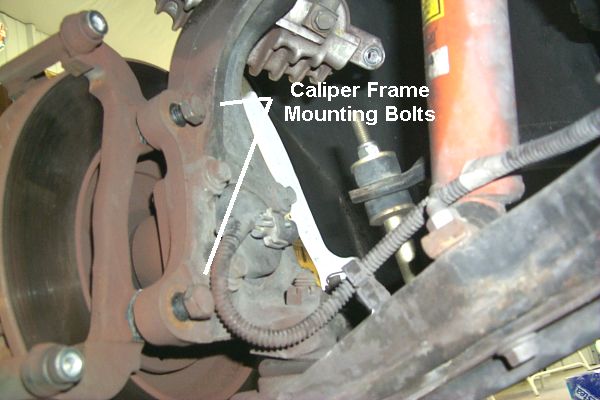
9. Next the Caliper Frame. Locate the two (2) 18mm bolts on the backside of the spindle (see Figure 8). The frame itself is threaded and the bolts slide through the spindle mount and into the Caliper Frame. Once these bolts are out, carefully remove the frame off of the rotor.
Figure 8
10. The rotor is a "Hat" design, that is it slides over the wheel studs just like the wheel (see Figure 9). The rotor is sandwiched between the wheel and the spindle. Now you know why it's important to properly torque the wheel lugs. Once everything is removed, now it's time to clean, clean, clean (see Figure 10).
Figure 9
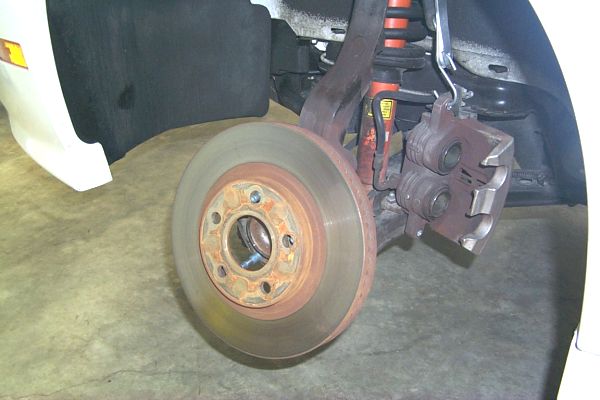
Figure 10
11. Reassembly is just the reverse order of the above steps.
12. Slide the rotor over the wheel studs.
13. Bolt-up the Caliper Frame. Use some thread locker and torque the bolts to 74 ft-lb on the front calipers and 74 ft-lb's on the rear calipers.
14. Replace the brake chatter plates (upper and lower) and slide the new pads into place.
15. Next, the caliper pistons need to be driven back into the housing. The new pads will be a lot thicker than the ones removed. The caliper pistons were against the old, thinner pads and can't be mounted on the new pads. So, there are several methods to accomplish pushing the pistons back into the caliper.
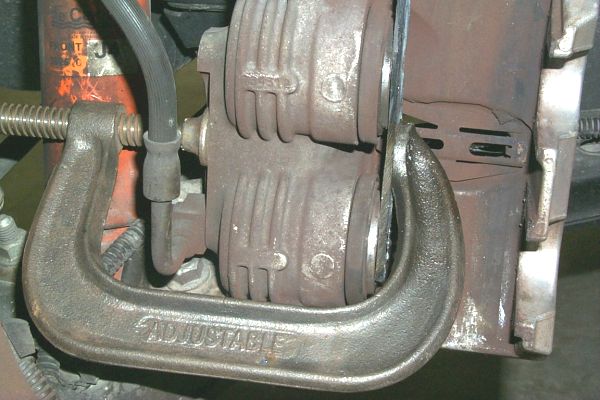
Here is the method we used. Place a 6" C-Clamp on the caliper and a solid piece across the 2 pistons (see Figure 11). This solid piece can be anything, like the old brake pad, a piece of wood or a piece of metal, as shown. The key here is the get an even clamp on both pistons and go slow. Also, remove a small amount of brake fluid from the master cylinder reservoir as pushing in the calipers will back flush fluid from the caliper into the braking system. And remember you will be doing this 4 times.
Figure 11
17. Once the caliper will fit over the brake pads, align the caliper mounting holes, apply thread locker on the caliper bolts and tighten to 23 ft-lb on the front calipers and 23 ft-lb's on the rear calipers.
18. And there you have one corner done, only three more to go!
Remember .....
1. Do one corner at a time. If something falls off and you aren't sure how it mounts, you can go to the other side and use it as a pattern.
2. You will have NO brakes when you first start the car and begin rolling. So be careful and act accordingly. Gently roll out the driveway slowly pumping the brakes till they return to their hardness. Now check your brake fluid level.
3. Break-in of brakes. There are several schools of thought here. Rule of thumb is very light braking for 200 miles or so, and then a couple of 50-75% panic stops. Then repeat. After a couple of cycles, you should be good to go.