Fuel Filter Replacement
Tools
you will need:
Expect approximately 30 minute – 60 minute change time. *This is your choice. We used our
set of Rhino Ramps©. |
Date:
May 29, 2000 Car: 1999 LS1 Z28 Camaro Installers: Eric & Kelly Barger Email: help@installuniversity.com People who helped us from major tech talk to general advice:
|
When purchasing, viewing, using, and/or any
other method applied to this publication you agree to the following statements.
You, your next of kin, heirs or assigns release www.installuniversity.com,
all other persons associated in the making, production, participation, and sale
of this publication. Rephrased in plain English: When you purchase
this CD, book, or view this web page you, your next of kin, heirs or assigns
agree not to sue any associated persons with the publication for any accident or
damage in ANY form (mental or physical to your car and/or yourself) because of
this publication or your failure to heed proper safety, maintenance and/or
modification procedures. You also agree that your next of kin, heirs
or assigns cannot sue all persons associated in the making, production,
participation, and sale of this publication.
Purpose: This is a regular maintenance item you should perform every ten to twenty thousand miles. This filter change gets overlooked quite a bit and most people probably never worry about it. So help out your car and change the filter.
Preface: Before you start into this install be sure you know how to use all of your shop equipment. This install will leak gasoline! No matter what you do you will have gasoline spill on the ground underneath the car. Do not breath the fumes, smoke, or start your car during this install. Perform this installation outside and NOT in a garage near any electrical or gas appliances! Take your time and be careful.
1. We backed our car up on our set of Rhino Ramps and chocked the front wheels. The ramps will raise the car a sufficient amount but it was a relatively tight fit for us under the car.
2. Take your keys out of the ignition.
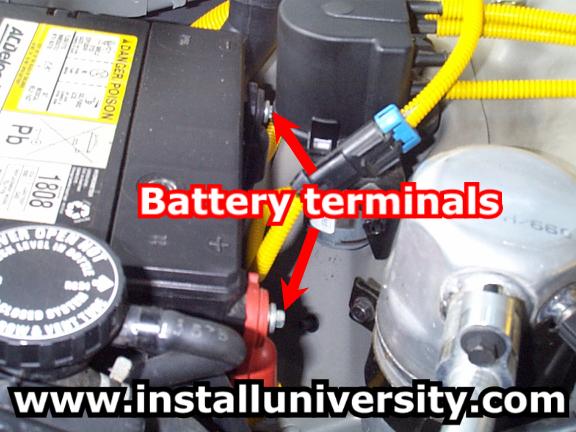
3. Raise the hood and remove the negative battery cable using a 5/16 wrench (see red arrows in Figure 1). Make sure the cable terminals are not touching anything but "air".
Figure 1
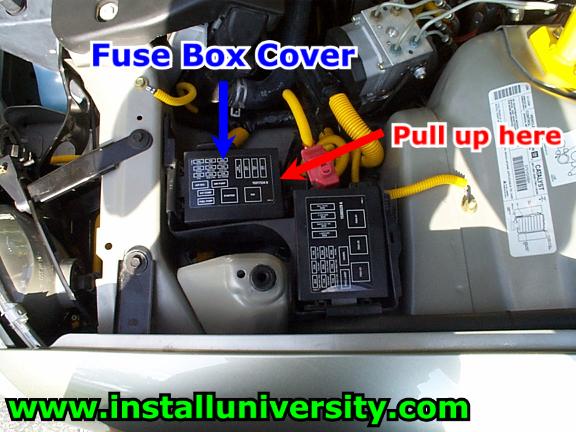
4. Now you want to pull the fuel pump fuse. Locate the fuse box cover where the fuse pump fuse resides (see blue arrow in Figure 2). You want to pull the cover off from the side closest to the rear of the car (see red arrow in Figure 2).
Figure 2
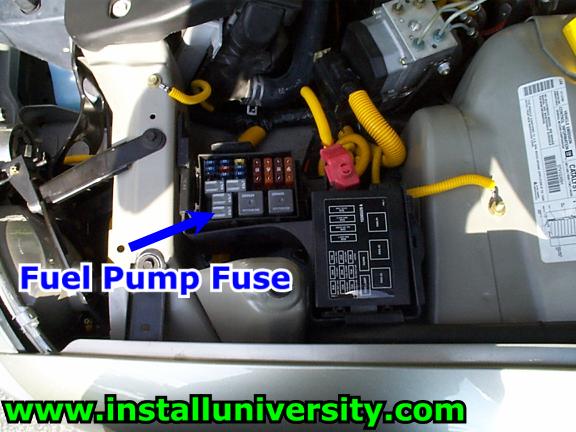
5. Now locate the fuel pump fuse (see blue arrow in Figure 4). You will need to pull this fuse out. We found it hard to pull the fuse out so we used a pair of pliers to do the dirty work. Just be careful not to crush the fuse if you use the pliers! This will ensure that the fuel pump does not activate while you are performing this install.
Figure 3
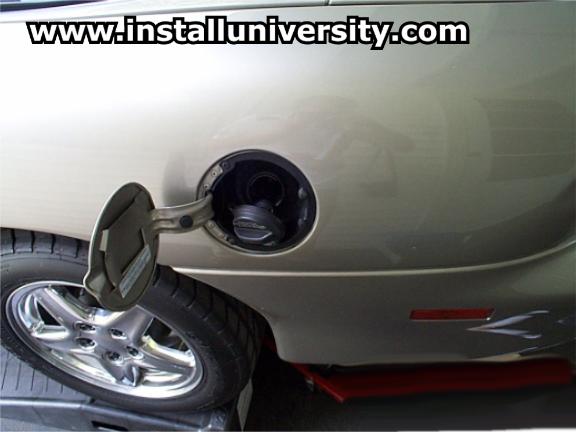
6. Remove the gas cap (see Figure 4).
Figure 4
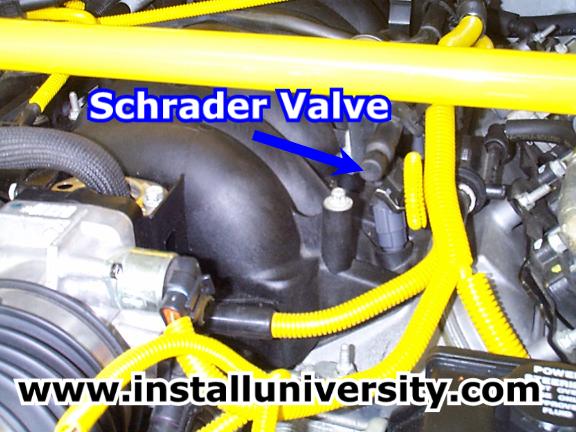
7. To insure that we have relieved all the pressure off the fuel system, you will need to purge the Schrader valve located on top of the engine. Locate the Schrader valve (see blue arrow in Figure 5).
Figure 5
8. Unscrew (counterclockwise) the cap off the Schrader valve (see Figure 6).
Figure 6
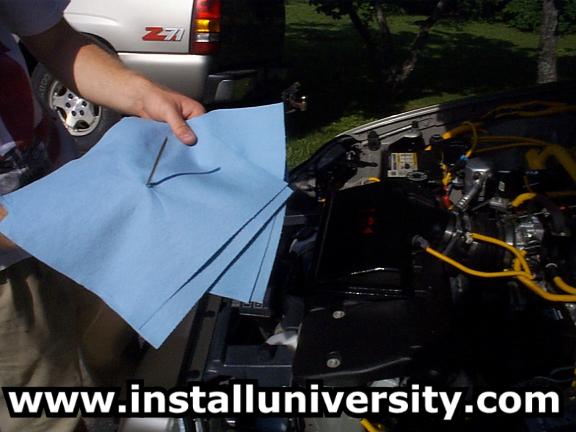
9. We used disposable shop towels and a screw driver to purge the Schrader valve. We simply took the screwdriver and punched it through the center of the towels (see Figure 7). Gently press the screwdriver up against the metal tab (much like releasing pressure for a tire). Be sure you wrap the paper towels around the valve so you don't get gas everywhere. Once you have completed relieving the pressure at the Schrader valve screw the cap back on the valve and dispose of the rags in a safe manner.
Figure 7
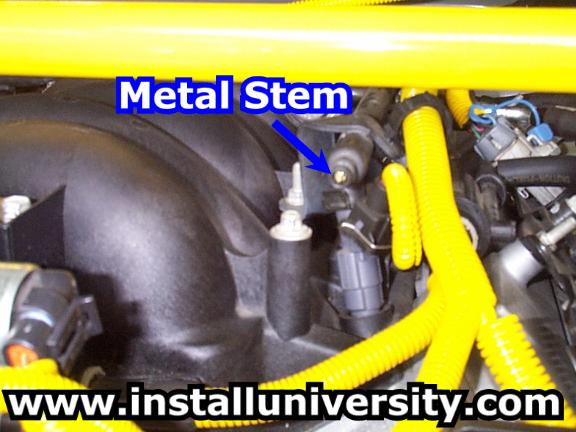
10. Before performing this step make sure you do this on an engine that is cold and not at or near operating temperature. The Schrader valve looks much like a valve stem on a tire. It acts in exactly the same manner as well. Place the towels around the end of the fuel rail where the Schrader valve is located and press the screwdriver gently on the metal stem in the middle of the rail (see Figure 8). Gasoline will spray out of the fuel rail for a few seconds. Be sure you have the towels around the Schrader valve to catch the spray.
Figure 8

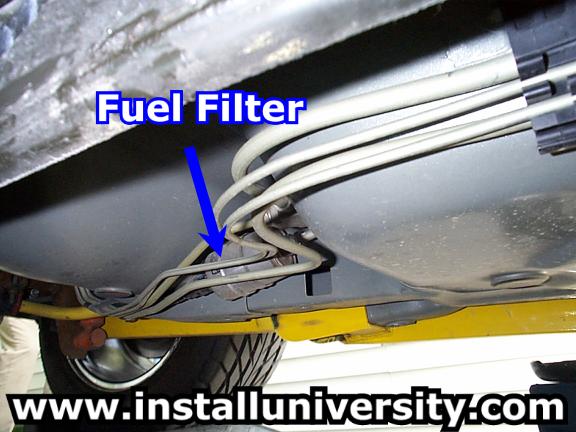
11. Now you need to locate the fuel filter. It resides just in front of the rear left wheel just inside the sub-frames (see blue arrow in Figure 9).
Figure 9
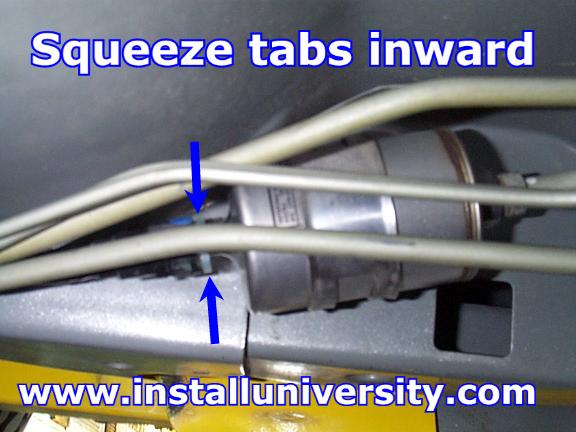
12. Have lots of old rags or a catch pan underneath the fuel filter ready to soak up or catch any spilled gas. Locate the release tabs on the gas tank side of the filter (see blue arrow in Figure 10). Squeeze down on the tabs and then remove the rubber fuel hose from the filter. You will have to pull just a little on the hose to get it to come completely off. You should experience some gasoline drain from the fuel assembly. The line may drain for 10 minutes or more so be very patient. This is a good time to get out from underneath the car and let the gas drain. Gasoline fumes are VERY DANGEROUS to breathe so please do not inhale them.
Figure 10
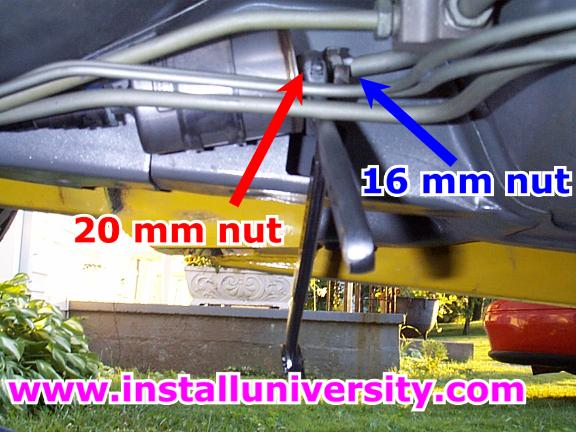
13. Place the 16mm wrench on the nut on the fuel line side. Then take your 20 mm wrench and place it on the nut on the fuel filter (see Figure 11). We used a small crescent wrench and it worked just fine. You will see more fuel leak out again, so be careful. Once you get the nut on the fuel line loose, slide it back along the fuel line. Remove the fuel filter and place it in the catch pain or on the rags (it will still have gasoline inside it so be careful).
Figure 11
14. Replace the filter with your filter in reverse to how you took the old filter off. Be sure you line the release tabs back up when installing the rubber hose back into the filter.
15. Remove all your tools, rags, parts, and catch pan from underneath the car. Wipe up any mess you left behind. Again, please be careful when underneath the car because the fumes from the gasoline are VERY DANGEROUS.
16. Wash your hands, arms, and any other part of your body that touched gasoline. You do not want gasoline on your hands while touching the battery cables, fuse, or the inside of your car.
17. Place the gas cap back on the car and shut the lid. Replace the Fuel Pump fuse into the fuse bank. Place the cover back on the fuse box. Reconnect the negative battery cable.
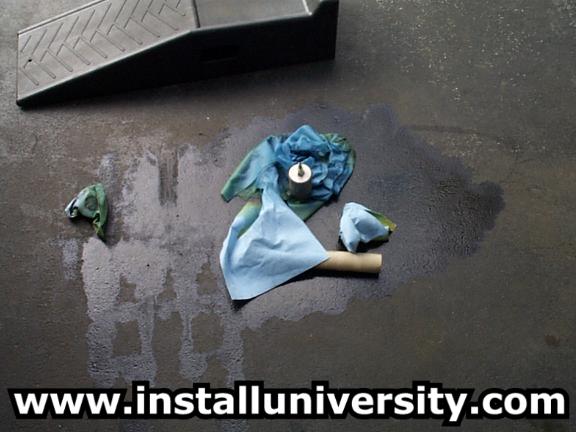
18. We PUSHED our car off the ramps and moved it so the car would not be over the spot where the filter was changed. Look at the mess we had after we pushed the car off of the ramps (see Figure 12). Gasoline was everywhere!
Figure 12
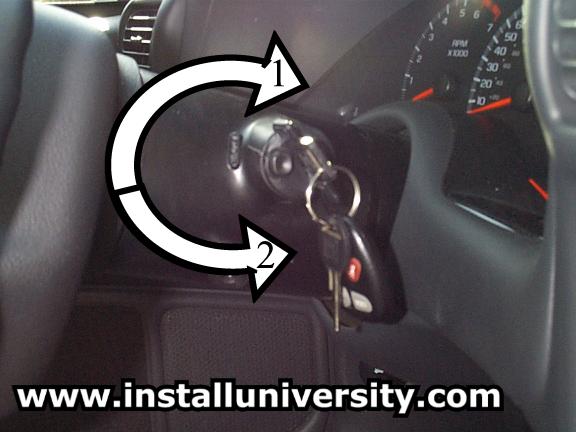
19. Place your key in the ignition and turn the key to the on position (see white arrow in Figure 13). Wait approximately five (5) seconds and then turn the key back to the "off" position. Repeat this step two (2) more times. You want to make sure the fuel pump turns on and places gasoline back in the system. Start the car and make sure you have no fuel leaks around the filter. If you have no fuel leaks then you are safe and your car is ready to drive. If you have a leak then make sure everything is securely fit and you have the nuts tight.
Figure 13
Comments: We could still see the yellowish color inside the filter housing on the filter. This is a good sign. Some people have reported some pretty dirty filters. This is a good mod to do every 10k or so miles.
Web Author: Eric Barger help@installuniversity.com
Copyright © 1999 - 2002 Eric Barger. All rights reserved.
Revised:
June 07, 2007
.