2002 C240: Oil Change
When viewing, using, and/or any other method applied to this publication you agree to the following statements. You, your next of kin, heirs or assigns release www.installuniversity.com, all other persons associated in the making, production, and participation of this publication. Rephrased in plain English: When you view this web page you, your next of kin, heirs or assigns agree not to sue any associated persons with the publication for any accident or damage in ANY form (mental or physical to your car and/or yourself) because of this publication, or your failure to heed proper safety, maintenance and/or modification procedures. You also agree that your next of kin, heirs or assigns cannot sue all persons associated in the making, production, participation, and publishing of this publication.
Perform all these installs at your own risk. Know how to use all of your shop equipment, and take necessary safety precautions when performing ANY modifications and or maintenance items to your vehicle. Seek the advice of a paid professional and do not substitute this publication for the advice of a paid professional. This product is how we accomplished our installs and is not meant to be carved in stone. InstallUniversity.com is not responsible for a mistake, misprint, or any other error found in this guide. This guide is intended as a supplement and not to be your only source of information.
Symptom(s): You travel to your local Mercedes Benz dealer and you get you a quote of $300 for a service (oil change/fluid top-off).
Date Repaired: 12.302006 Mileage: 86,000
Quote to fix from local MB dealer: $300
Part information, cost, were purchased:
1. Oil filter from NAPA Part number: 1226 (same filter as Mercedes Benz)
2. Mobile 1 Synthetic 0-40w oil: 9 quarts
Time it took to install: 30 minutes
Complexity of Install: Easy
Tools needed for this install:
1. Ratchet
2. Short socket extension (3" will do)
3. 13 mm socket
4. 8 mm socket
5. Ramps - Lift - Jack stands and jack
6. Rags
Install Contributors
1. Phil Watson - Helper
Introduction
This is an easy service to perform and will cost you much less than MB performing the installation.
The part numbers pulled off the tops of the compartments are as follows:
1. Oil filter from NAPA (same filter as Mercedes Benz):
2. Mobile 1 Synthetic 0-40w oil: 9 quarts
Installation Procedure
1. Raise your vehicle on a lift, ramps, jack stands, or suitable safe position in a safe manner. You have a choice whether you want to get under the car and make it a SAFE one. Take no chances with your life (Figure 1).
2. Raise your hood and unscrew the oil filter canister on the driver side front of the engine compartment (Figure 2). Remove the gaskets and oil filter and dispose of them in an environmentally safe way at your oil collection center. Wipe off the filter holder with a clean rag. Lay the oil filter holder to the side.
3. Place a clean rag over the oil canister opening. We want to leave that open to the atmosphere while the oil drains but the rag will keep any bugs or other contaminants out of the oil system, just in case.
4. The under car covers must be removed to access the oil drain plug. Remove the twelve 8 mm bolts from underneath the car (Figure 3). Remove the bolts starting in the front working your way back to the rear of the car. The blue arrows in Figure 3 represent the common bolts to the front and rear covers. Be sure the rear cover is above the front cover. Watch out, the covers will fall on your head once the bolts are removed. Lay the bolts and covers to the side. You will need to use the 3" extension for two of the bolts.
Note: Mercedes Benz dealers generally remove the oil out of the oil pan from the top of the motor using a vacuum assisted evacuation system. There are many systems that you can utilize that require hand priming to suck the oil out of the oil pan from the top. We have experimented with several oil evacuation systems and have never been able to pull out more than 8.25 quarts of oil from the oil pan. Therefore, we don't suck the oil out from the top and and we use the drain plug under the car in the oil pan to drain the oil. Just be careful under your car.
5. Locate the oil drain bolt on the oil pan (Figure 4). Have a catch pan under this spot that will hold at least 12 quarts of oil (Figure 5). Once you remove the drain plug, be fast about getting it and your hand out of the way. Remove the oil drain plug with a 13 mm socket or wrench. Have a few rags handy if this is your first doing this.
The longer you let the oil drain the better. We usually let the oil drain for 10 - 15 minutes. This makes sure as much used oil is removed from the oil pan as possible.
6. While the oil is draining get the new oil filter and assemble it. You will find the gaskets may be a little tough to get on. It is ok to put a few drops of new oil on the gaskets so they slide on easy. It is not necessary but can make tight gaskets eay work to put on.
The correct order to assemble the filter and gaskets is shown in Figure 6. Assemble the pieces starting with the largest gasket and working your way to the smallest one. Take your time and don't cut the big gasket on the threads of the oil filter holder.
7. Once all the oil has drained out, replace the oil drain bolt (Figure 7). Thread the oil drain bolt on several threads and stop, take a rag and wipe clean around the bolt, and then thread it hand tight. Use a torque wrench and tighten to 20 ft-lb. Wipe off any excess oil or mess on the oil pan.
8. Remove the rag that was covering the oil filter canister housing and pour in 8.5 quarts of oil (check owners manual for exact amount and type of oil to use) (Figure 8).
9. Install the new filter and hand tighten only (Figure 9).
10. At this point you have a decision to make. I always do choice number one and have never had a problem. Sometimes, it happens, so take this into consideration when making your choice.
Choice one: Accept that you performed the installation perfectly and reinstall in the under car covers starting at the rear of the car working your way toward the front.
Choice two: Remove the car from the safe supports. Place the car on level ground and check the oil level via the in-dash display (see below for details) and for any leaks around the oil drain bolt. Then raise the car back up on safe supports to replace the under car covers starting at the rear of the car working your way toward the front.
11. Once the service is completed and you have everything finished you need to reset the Flexible Service System (FSS) so you will know when to service your car next.
Procedure for year models listed below:
2002 C240 Sedan
Page 140 in manual
1. Turn key to the on position.
2. Change the display to the "Service Page" (in "x" miles).
3. Hold in the reset button on the dash until the screen changes (approximately 3 - 5 seconds).
4. The screen will ask for confirmation by pressing in the reset button in the dash for 3 secionds.
5. The next screen will say that service A or B is due in 10,000 miles.
Click on the photographs to enlarge them.
Figure 1
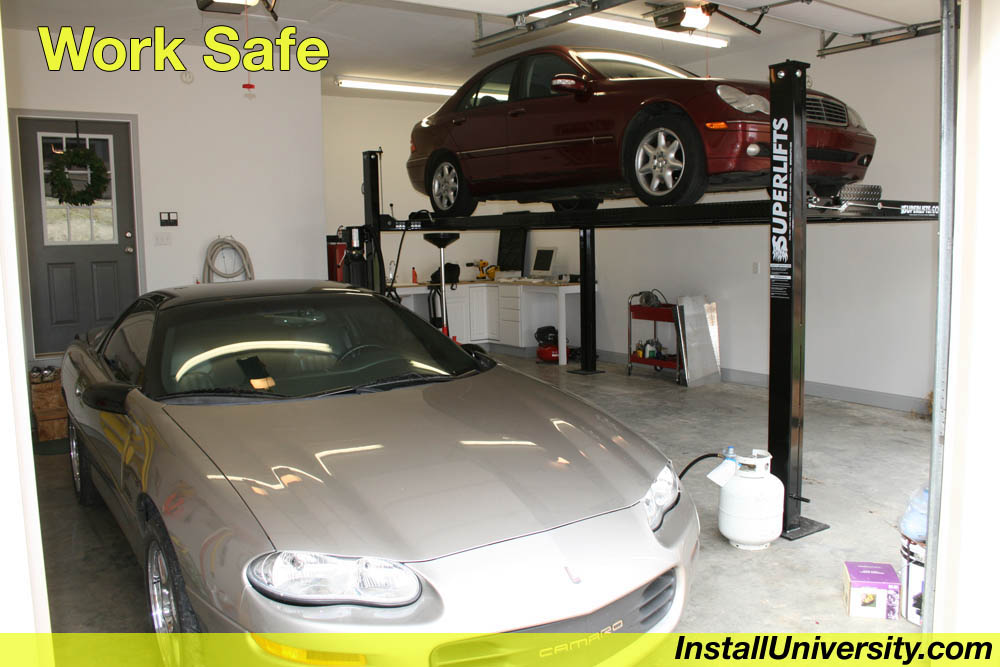
Figure 2
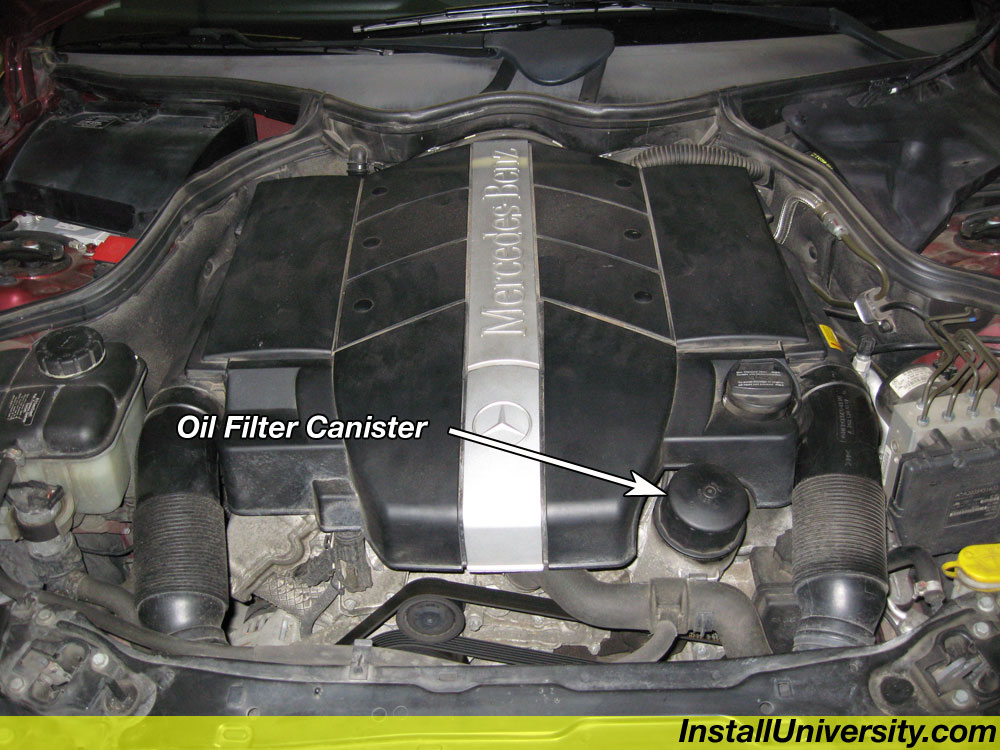
Figure 3

Figure 4
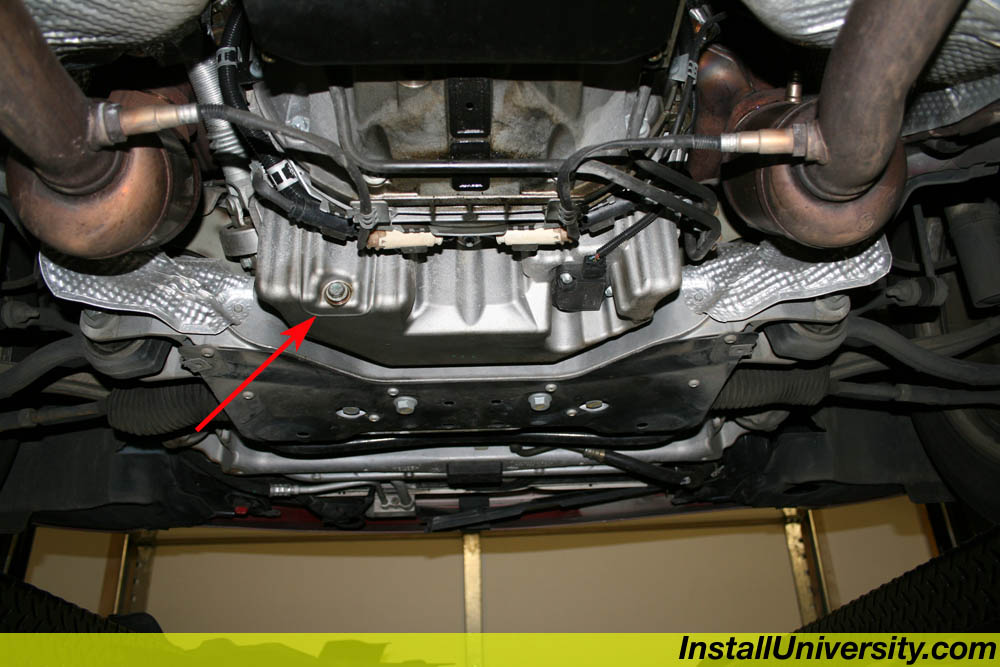
Figure 5
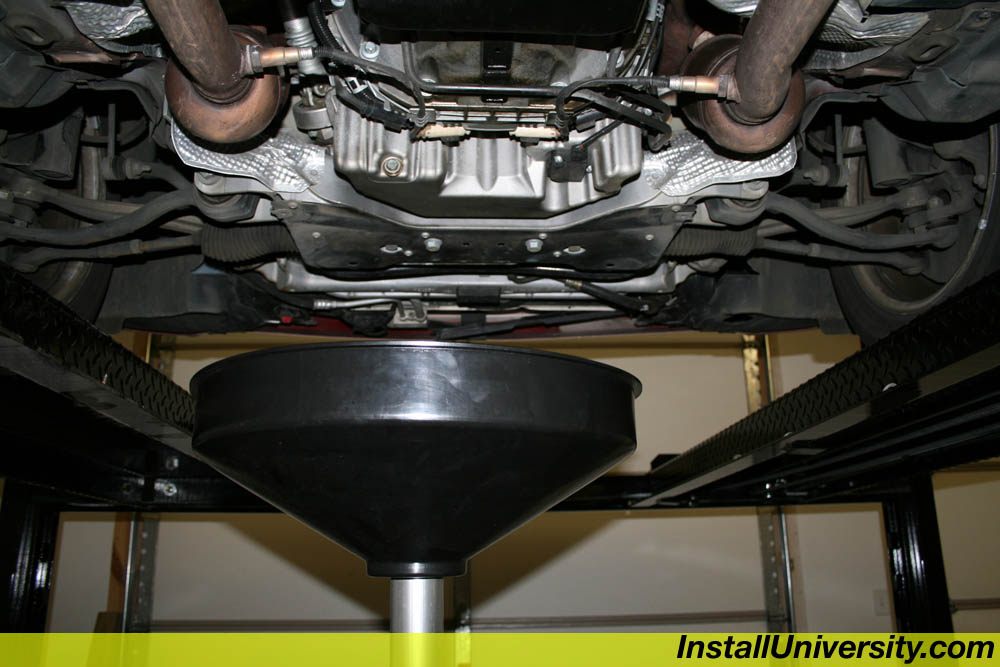
Figure 6
Figure 7
Figure 8
Figure 9