2002 C240: Driver's Side Visor
Replacement
When viewing, using, and/or any other method applied to this publication you agree to the following statements. You, your next of kin, heirs or assigns release www.installuniversity.com, all other persons associated in the making, production, and participation of this publication. Rephrased in plain English: When you view this web page you, your next of kin, heirs or assigns agree not to sue any associated persons with the publication for any accident or damage in ANY form (mental or physical to your car and/or yourself) because of this publication, or your failure to heed proper safety, maintenance and/or modification procedures. You also agree that your next of kin, heirs or assigns cannot sue all persons associated in the making, production, participation, and publishing of this publication.
Perform all these installs at your own risk. Know how to use all of your shop equipment, and take necessary safety precautions when performing ANY modifications and or maintenance items to your vehicle. Seek the advice of a paid professional and do not substitute this publication for the advice of a paid professional. This product is how we accomplished our installs and is not meant to be carved in stone. InstallUniversity.com is not responsible for a mistake, misprint, or any other error found in this guide. This page is my experience and only documented as a reminder for myself for future references if I encounter this problem again.
Symptom(s): Your mirror cover on the visor losses the spring force and will not completely close leaving the vanity light on while the visor is in the down position.
Date Repaired: 10.012004 Mileage: 86,776
Quote to fix from local MB dealer: $150
Part information, cost, were purchased:
1. Driver side visor - A2038101310 (need 4-digit trim color code) - $91.20 - Mercedes Benz of Knoxville
Time it took to install: 5 minutes
Complexity of Install: Extremely Easy
Tools needed for this install:
1. T20 torx screw driver
Install Contributors
1. Steven Lewis (a.k.a. saturnstyl @ MBWorld.org)
Introduction
Figure 1 shows the visor that will be replaced. Notice that the visor is in the down position and the mirror cover is not shut causing the vanity light to remain on. The only factory fix is to replace the entire visor unit. The new unit has a much stiffer spring and I must assume will last a lot longer.
Installation Procedure
1. Remove the visor from the electrical outlet/hinge as shown in Figure 2.
2. Locate and remove the two screws holding the visor in place as shown in Figure 2.
3. Figure 3 shows the view without the visor.
4. Reattach new visor and reinstall bolts to "snug" as shown in Figure 4. When one one bolt is in, before flipping the visor to the opposite side to install the other screw, be sure and support the support base without the bolt to insure you don't break the support base.
5. Snap the visor back into the electrical outlet/hinge and your done! Figure 4 shows the new visor in place. Notice the new visor does not come with any stickers making for a cleaner look than the factory visor (see Figure 5).
Click on the photographs to enlarge them.
Figure 1
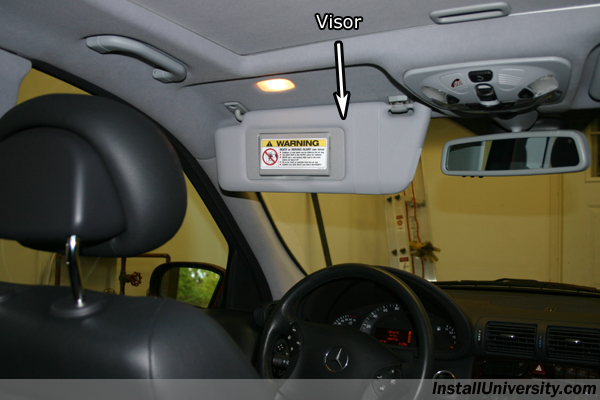
Figure 2
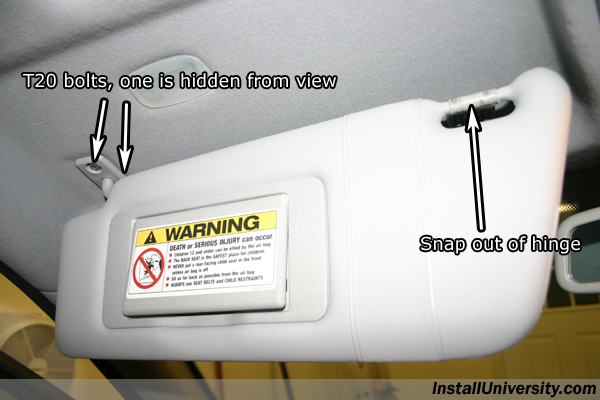
Figure 3
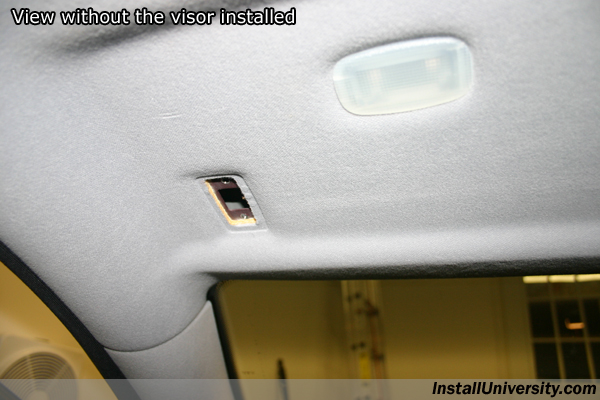
Figure 4
Figure 5
